The Windows Resource Protection (WRP) feature is available in Windows 7, 8, 10, and Vista. It is a program that prevents any changes to relevant folders, files, registry keys, and more.
These programs are essential to keep the operating system running. You can also modify the WRP if you want.
But if you’re not knowledgeable when it comes to it, then you don’t need to change anything.
Reasons Why the WRP Could Have Problems
However, there are times when the WRP doesn’t function well. The Windows Resource Protection could not start the repair service, but the good thing is that there are ways to fix that problem.
- It can happen when you download or installed something questionable. There are other viruses that can alter the programs inside your device.
- Another reason is that Windows failed to make an update. There are times when Windows will automatically update. It could be a case where the internet got cut off, or something happened with the update. That can alter the WRP in the process, but it is something that you can alleviate by just continuing or doing the update again.
Using the Modules Installer Service
Step 1: Open the Run option, or you can search for it if you can’t find it.
Step 2: After opening Run, type on the Open options “services.msc”
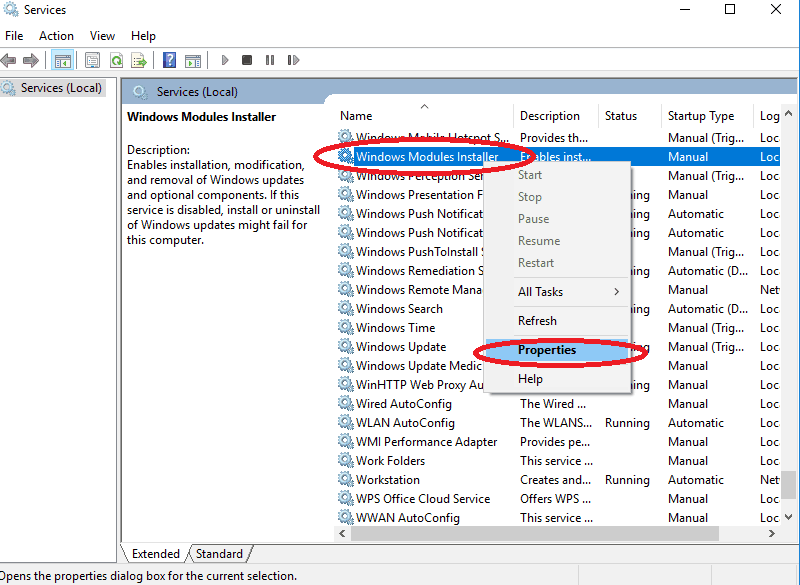
Step 3: Based on the image below, right-click on the “Windows Module Installer” and press on Properties.

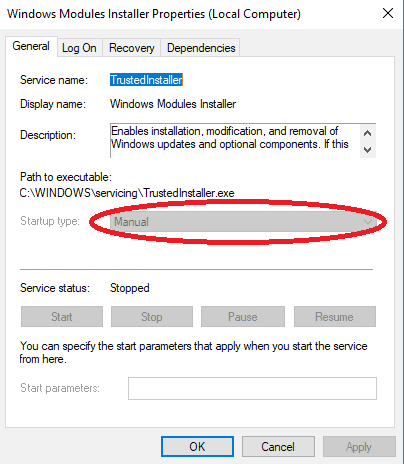
Step 4: Now that you’ve opened Properties, you need to change the Startup Type to “Manual”.
If you take a look at the image below, it is already in Manual, so if it isn’t already, then you need to change it.

Using the Command Prompt
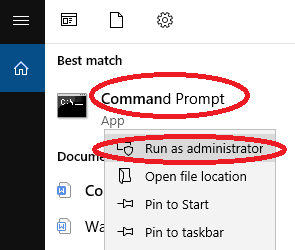
Step 1: Open the Run option and search for Command Prompt.
Step 2: In the case of opening Command Prompt, you need to run it as an Administrator if you aren’t already so that you can get full access.:

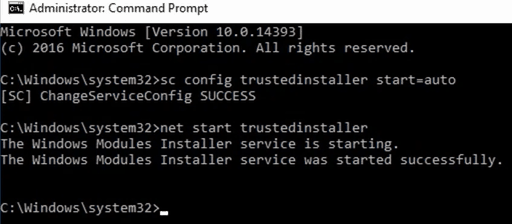
Step 3: If you look at the image below, you will need to type the following code to repair the problem of Windows Resource Protection could not start the repair service.
Type first “sc config trustedinstaller start=demand”. Press Enter and wait until it starts and it ends successfully.

Running in Safe Mode
When you turn on your unit, you can run in Safe Mode. The features you will have are all in the basic factory setting.
This method isn’t as effective, but it can be a good option when all else fails, although again, it may not help, there’s any harm in trying it.
In closing
Remember that once you do any of the first two methods, always run the System File Checker and see if the problem persists.
Don’t forget to restart after every fix that you try to do. That way, you can find out if it worked or not and find other methods.
